A screenshot is an image taken from your device’s screen. You can take a screenshot on just about any platform, and taking screenshots in Windows computer is not that different. If you want to snap a screenshot of anything on your computer screen, Windows 10 offers various methods to accomplish this task. In this article, we will learn about four easy ways to do this.
In short, we can take screenshot in windows 10 using this following 4 easy methods:
- Take a screenshot on Windows 10 with the Snipping Tool
- Print Screen button from the keyboard to snap a screenshot
- Take a screenshot using the Windows game bar feature
- Using the Windows key + Print Screen button
Now let’s explore each method with some brief discussion –
Table of Contents
Method #1
Taking a screenshot on Windows 10 with snipping tool.
Snipping Tool is a flexible screenshot utility made available by Microsoft Corporation. Even though Windows 10 snipping tool was introduced long ago along with Windows Vista, it still remains in Windows 10. The snipping tool can take screenshots of an open window, rectangular area, or the entire screen. For Windows 10, Snipping Tool has a “Delay” option, so you can time-delay a screenshot from one to five seconds.
You can easily take a screenshot in Windows 10 using Snipping Tool by following these simple steps:
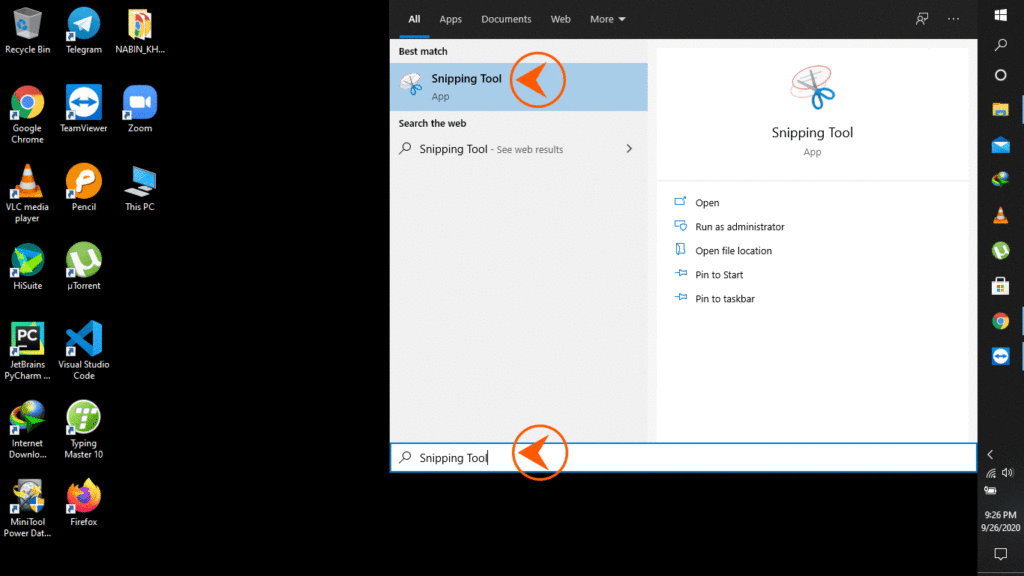
1. First of all run Snipping Tool from the Start menu on taskbar.
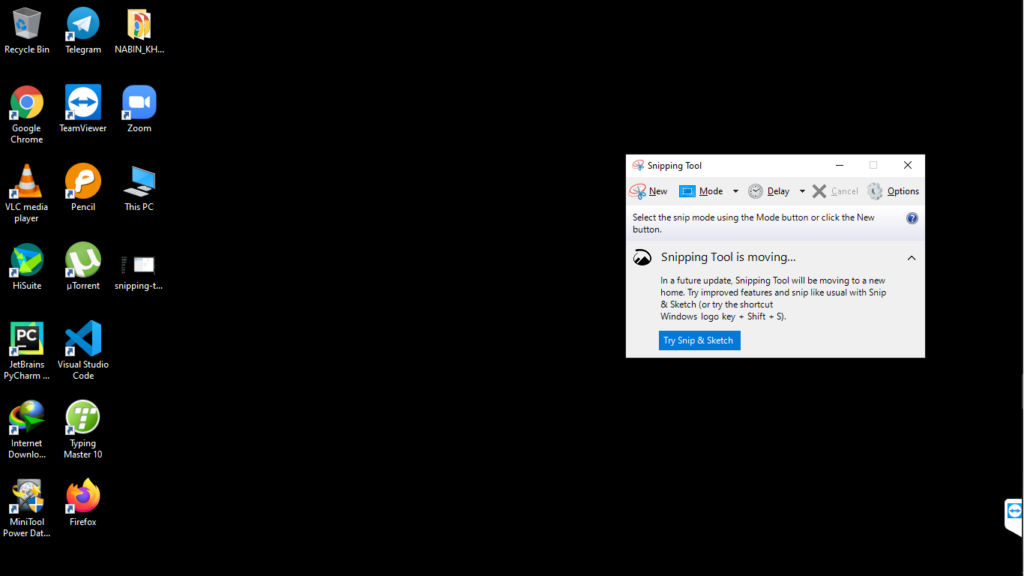
2. From the mode option in snipping tool, select the shape of your screenshot as you want.
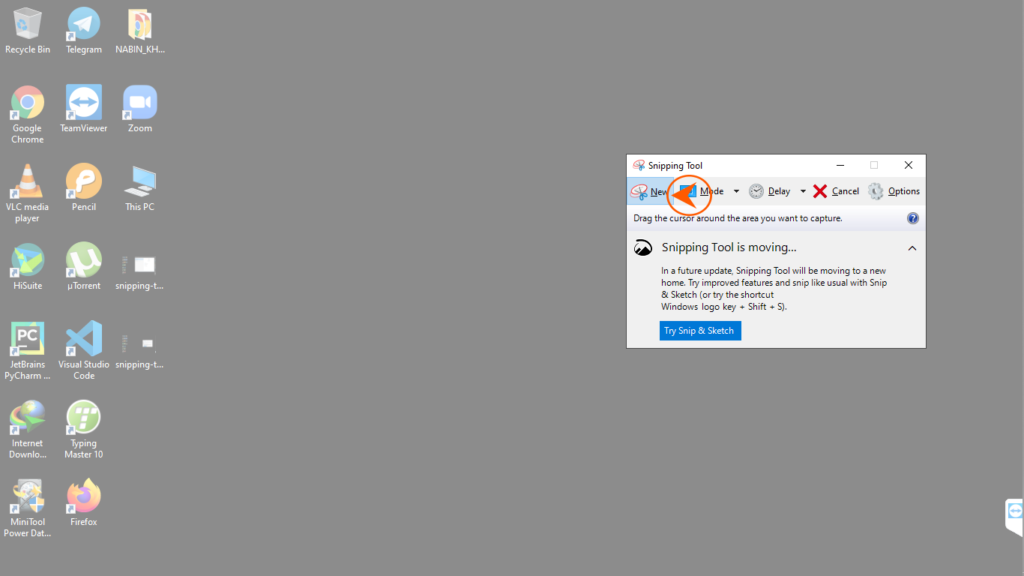
3. After you click New, your screen will freeze and you can use the mouse to create the screenshot. Now the screenshot will appear in the Snipping Tool window.
4. Once you have taken the screenshot, you can also use the drawing tools to annotate the screenshot.

5. Finally when you’re done, first click “File” and then “Save As” to save the captured screenshot to your computer.
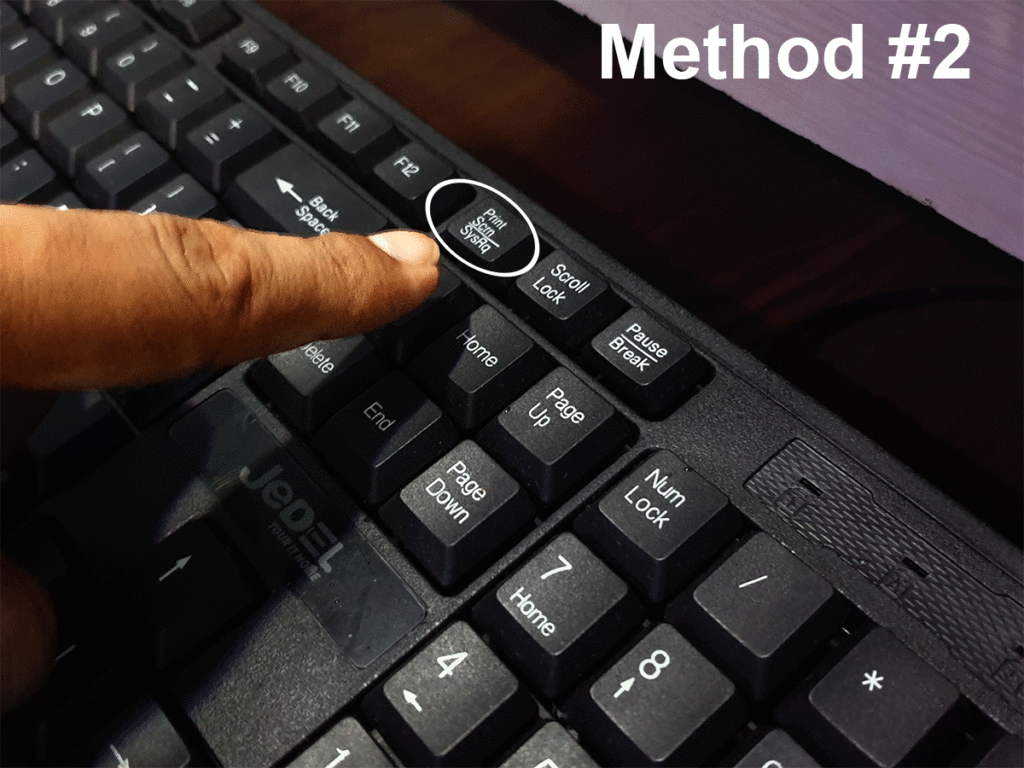
Method #2
Taking a screenshot on Windows 10 using the print screen button from the keyboard.
This method is one of the convenient technique available for taking a screenshot in Windows 10. Here we need to press the “Print Screen” key on our keyboard to capture a screenshot of your computer screen. You will find a print screen button labeled as “PrtScn,” “PrntScrn,” or something similar depending on your keyboard layout. Usually, it is located between F12 and Scroll Lock button on the keyboard. To capture your entire screen, you have to tap the Print screen button first. However, your screenshot will not be saved as a file and will be copied to the clipboard. Finally, you will have to open an image editing tool (For instance, Microsoft Paint), paste the screenshot in the editor, and you can save your file from there.
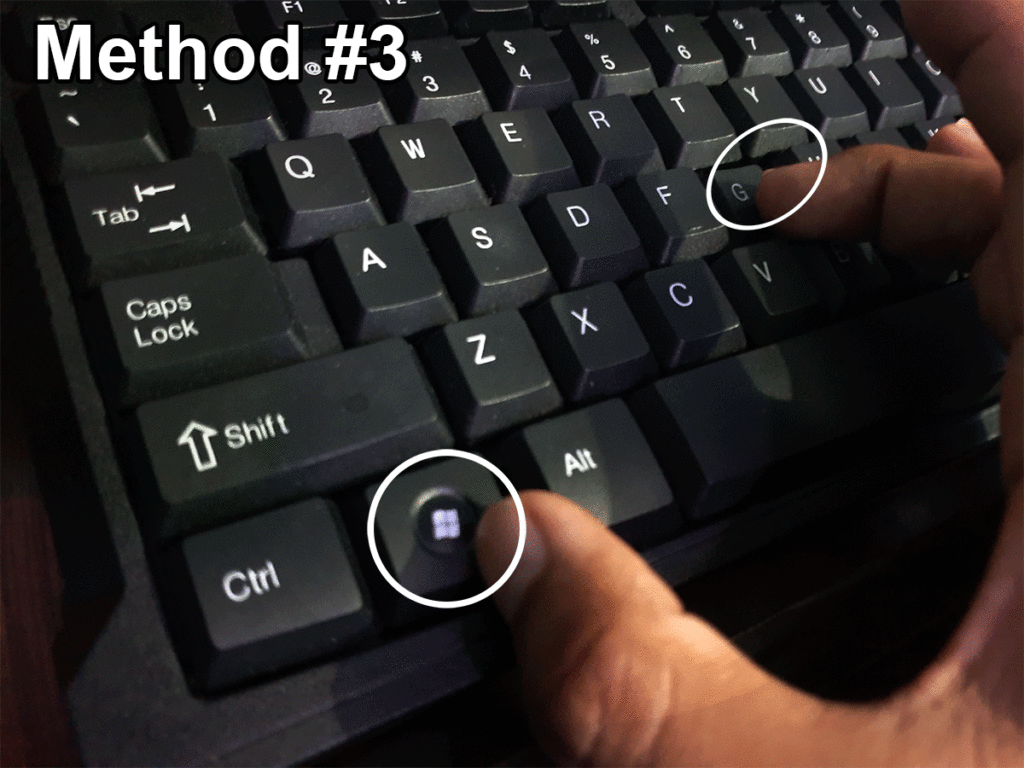
Method #3
Taking a screenshot on Windows 10 using Windows game bar feature.
You can use the Game bar to snap a screenshot even if you are in the middle of your game. In this method, screenshots are in PNG format, and your computer saves them in “C:\Users\ [your username]\Videos\Captures.”. First, press the (“Windows key + G” by default) to call up the Game bar. Now you can snap the screenshot of your screen following either of the steps mentioned below,
- Click the Camera icon available in the Game bar
Or,
2. Use the default keyboard shortcut Windows key + Alt + PrtScn to capture full-screen screenshot.
Method #4
Taking a screenshot on Windows 10 using Windows key + Print Screen button.
This method is much simpler than most of the other ways of snapping screenshots in Windows 10. Here you have to press the Windows key + Print Screen key. It saves the entire screen of your computer as an image file. Now you will notice your computer screen will get slightly dim as a confirmation that you’ve captured a screenshot. You can find it inside the screenshot subfolder of the pictures folder of your computer.
So these are the four easiest technique by which you can take a screenshot in windows 10. We hope you enjoy this post, and also share this post with your friends and relatives to spread knowldege.


